QR code to a collection pageUpdated 2 months ago
Overview: create a QR code that opens a collection page
In QuiQR Codes, you can create a QR code that sends customers to a specific collection in your Shopify store. This guide follows the same flow you see in the app - from the Dashboard to saving and downloading your code.
1) Start from the Dashboard
From your Shopify admin, open Apps → QuiQR Codes to land on the Dashboard. This screen shows quick stats like Total QR Codes, Active Codes, Archived Codes, and Total Scans.
To begin, select Create QR Code (top right).
NOTE
If you see the Setup Guide card on the dashboard, it also directs you to Create QR Code and outlines the fields you’ll complete.
2) Open the Create QR Code form
You’ll be taken to Manage Codes → Create QR Code. The form is on the left and a live Preview of the QR code is on the right.
.jpg)
3) Add a name and (optional) description
- Enter a name - In Name *, enter a clear internal name (for example,
My Collection QR Code). This helps you find it later in Manage QR Codes. - Add a description (optional) - Use Description (Optional) to note where you’ll use the code (poster, shelf sign, packaging). The field shows a character counter (up to 200).
TIP
Use a consistent naming pattern like Collection – Location – Month so scan results are easier to interpret later.
4) Link the QR code to a collection
- Set the Action to Collection - Open the Action * dropdown and select Collection. The form updates to show Select Collection *.
- Choose your collection - Under Select Collection *, select Change Collection to open the Select collection modal.
.jpg)
3. In the Select collection modal:
Use Search collections to find the collection (optional).
Tick the checkbox next to the collection you want.
Select Select to confirm.
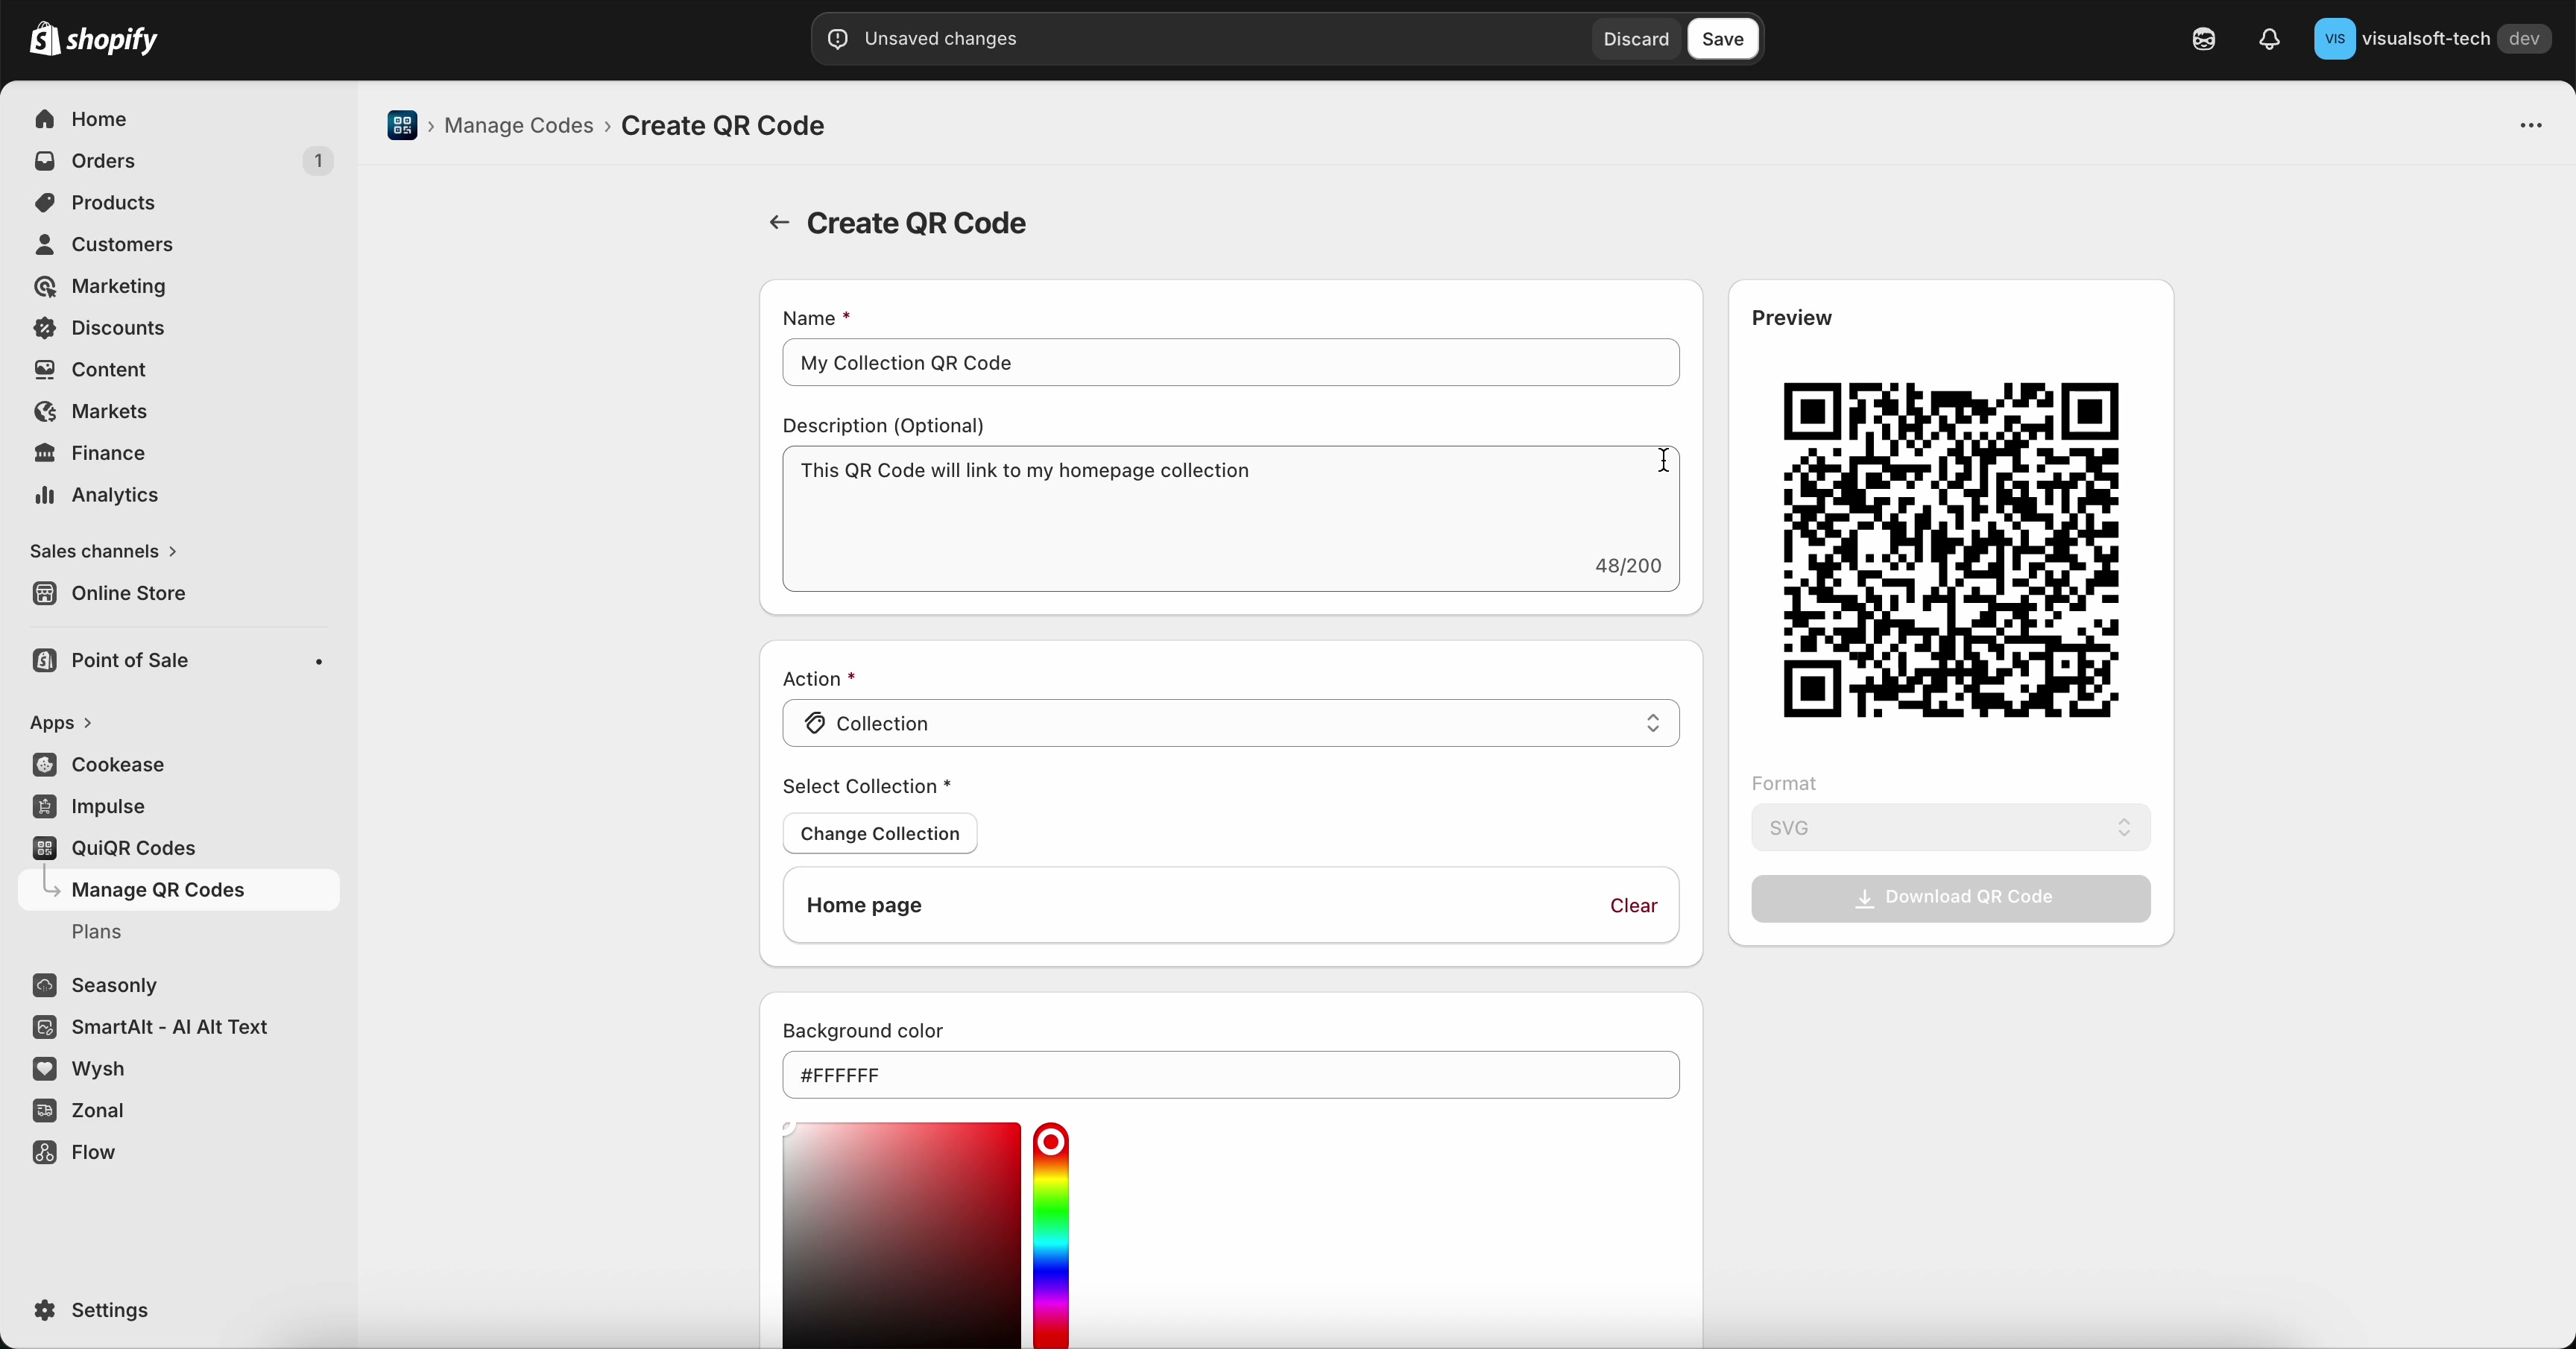
You’ll return to the Create QR Code page, and the chosen collection appears under Select Collection. The Preview updates to match your selection.
NOTE
If you picked the wrong collection, select Change Collection to choose a different one, or use Clear to remove the current selection.
5) Save, then download your QR code
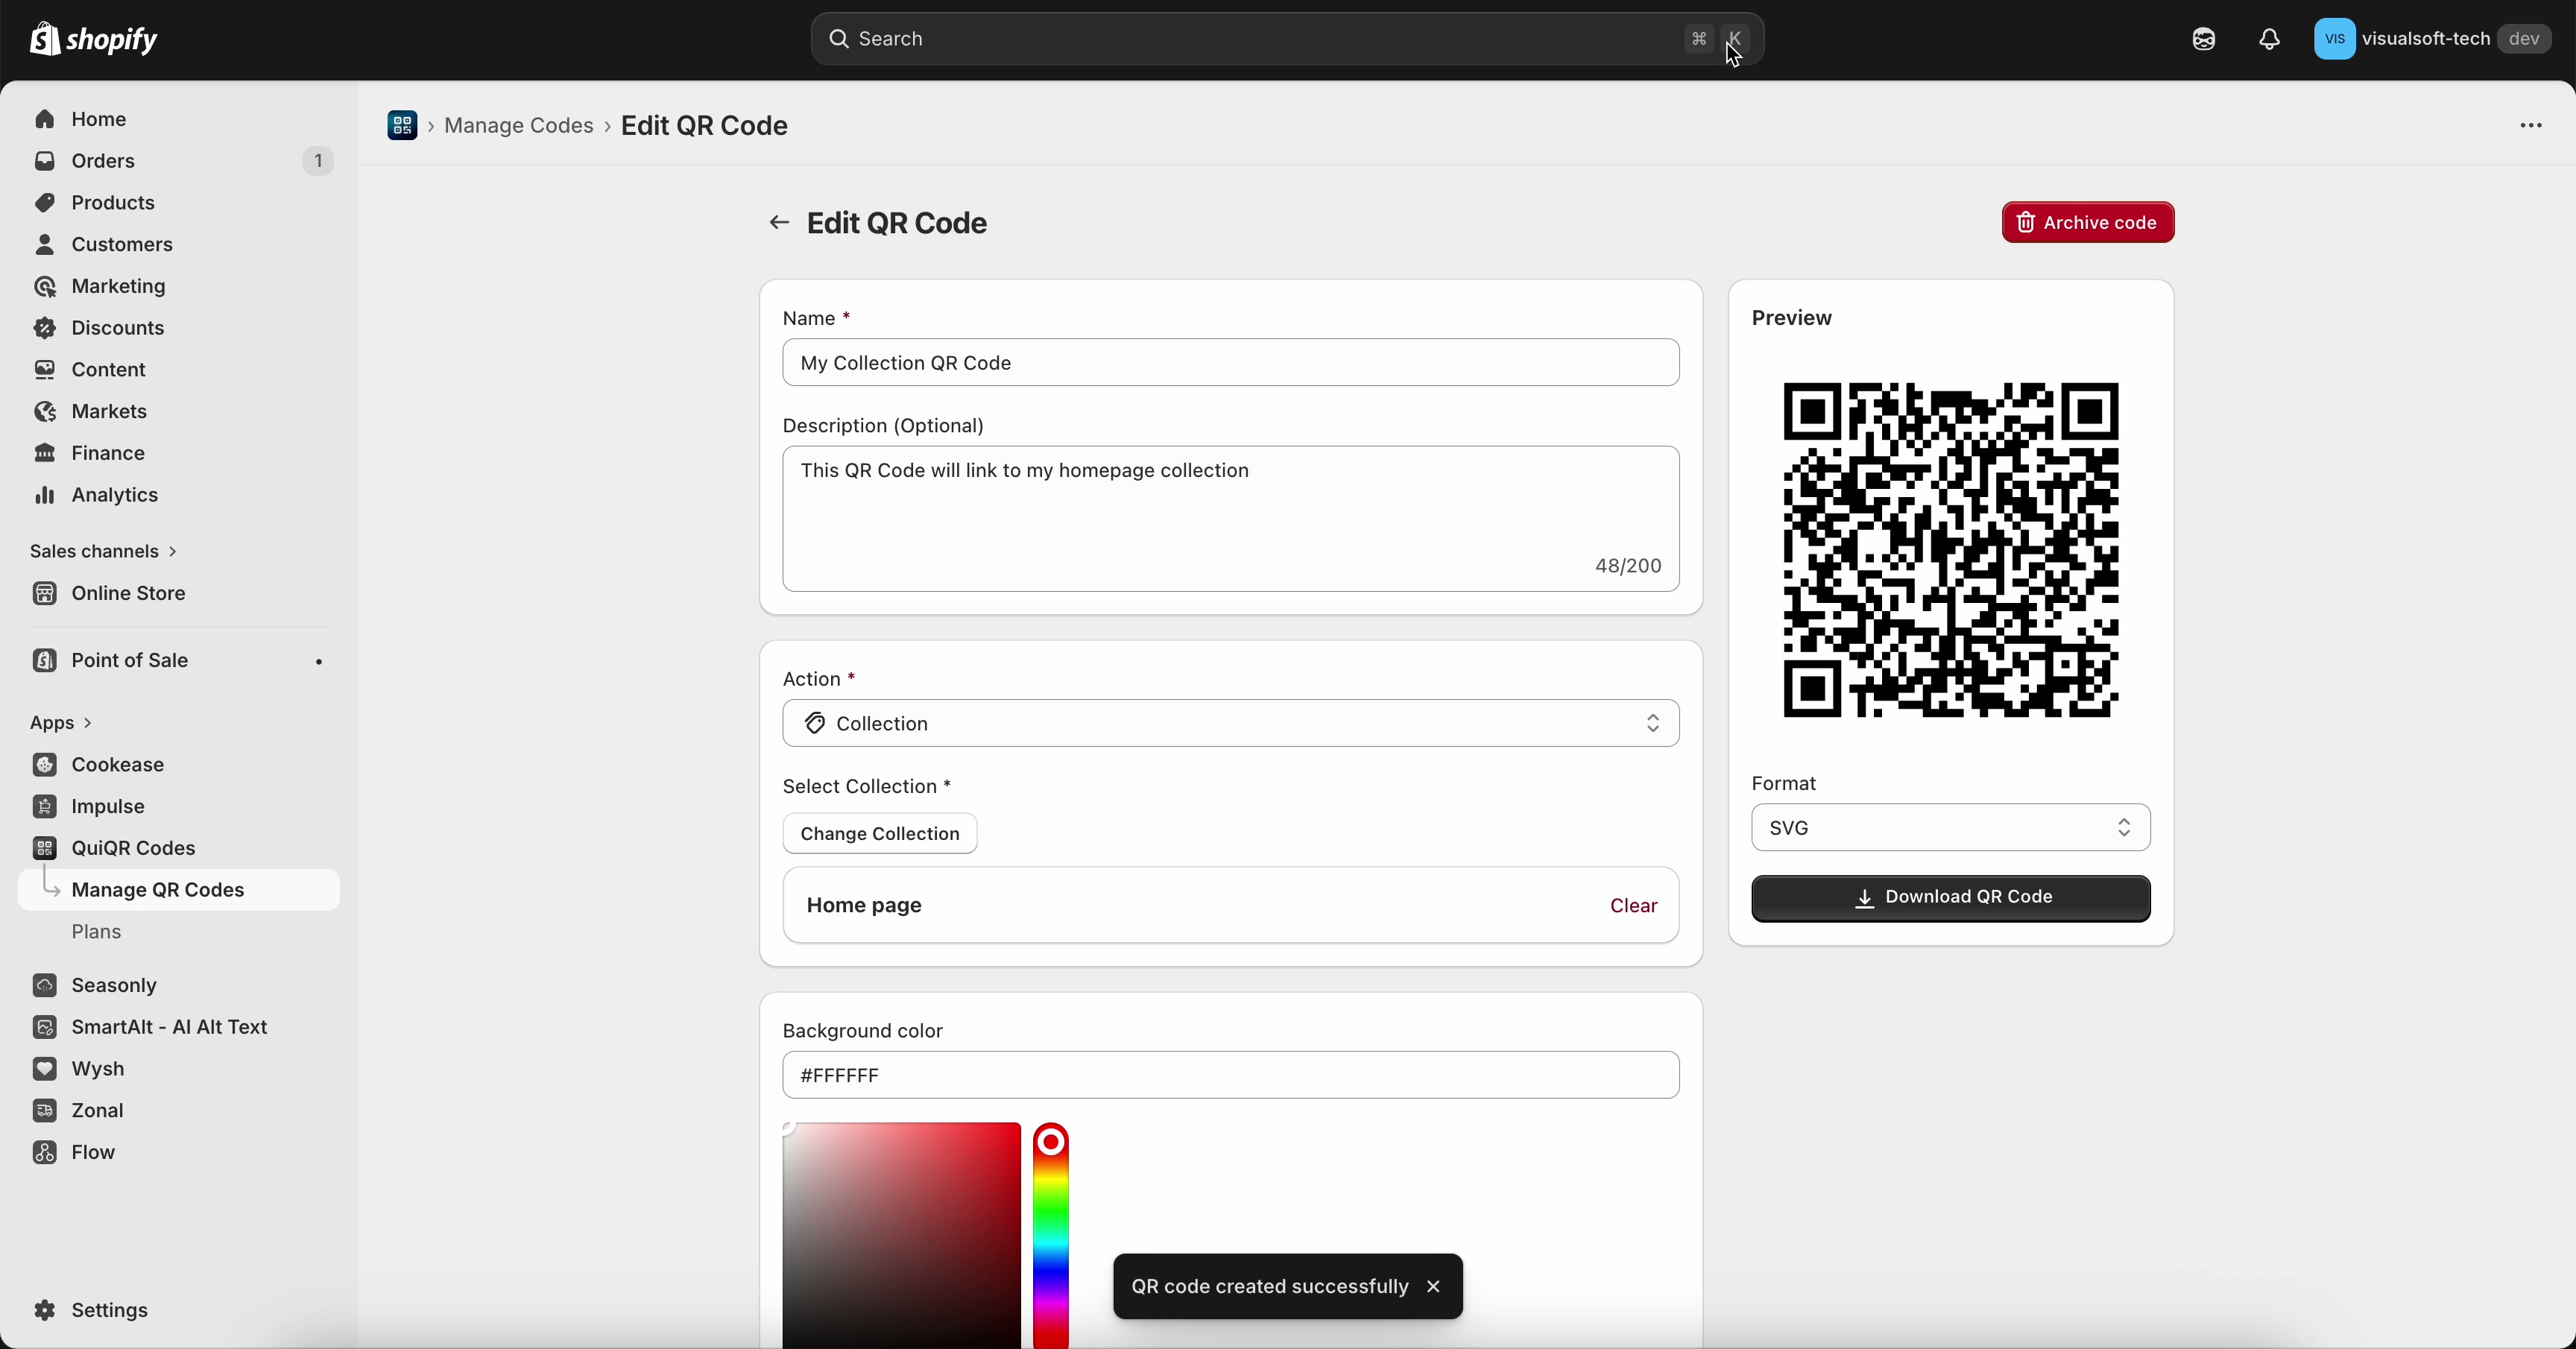
- Save your QR code - Select Save in the top bar to create the QR code. (Use Discard if you don’t want to keep your changes.)
- Download the file - In the Preview panel, choose a file type from Format (for example, SVG), then select Download QR Code.
WARNING
For reliable scanning, keep strong contrast between Background colour and Foreground colour. If you customise colours, always re-test the QR code before printing.
Quick checks before you print
Test scan: scan the downloaded QR code with your phone and confirm it opens the correct collection page.
Confirm selection: verify the collection name shown under Select Collection is correct (use Change Collection if not).
Print size: if you’re printing small labels, do a test print and scan from the expected distance.